
In this blog, we will get to know about deploying any custom SAPUI5 application into SAP Fiori launchpad.
Prerequisites
- User must have access to SAP Logon.
- User must have access of TCodes: SE80, /UI2/FLP, /UI2/FLPD_CUST, /UI2/FLPD_CONF, /UI2/_FLPCM_CUST, /UI2/FLCM_CONF, /UI2/SEMOBJ, PFCG.
- User must have access to SAP BTP Cockpit, Business Application Studio(BAS) or SAP Web IDE.
Procedure
Step 1: Upload the SAPUI5 application as a BSP application.
Once you have created your SAPUI5 or FIORI app in Eclipse/Web IDE, the project can be uploaded into the SAPUI5 repository as a BSP application.
The ABAP report /UI5/UI5_REPOSITORY_LOAD can be used to upload the UI5 application.
Steps
- Execute the report /UI5/UI5_REPOSITORY_LOAD in SE38.
- Enter the Z name for the SAPUI5 App.
- Choose Upload.

- Execute
 .
. - A dialog box will appear prompting to enter the application source directory.
- Enter the Eclipse project source directory, WebContent, and click on OK.
- A summary of the objects to be uploaded is displayed.

- Click on the green highlighted link.
- The files are now uploaded.
- The following is shown in the status bar.

- Check the BSP application zwalkthrough in se80.

- Fix the src location of the file sap-ui-core.js if needed to
- /sap/public/bc/ui5_ui5/resources/sap-ui-core.js
- Also, check the service name zwalkthrough in SICF.

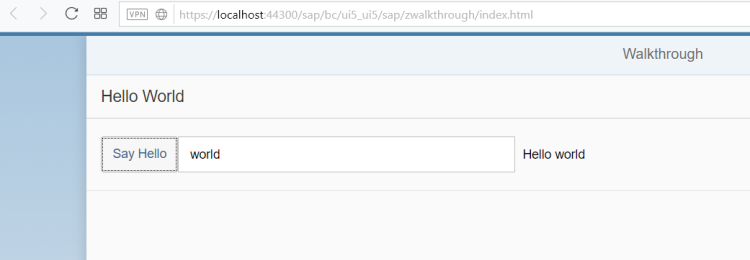
- Right-click on zwalkthrough and choose Test service.

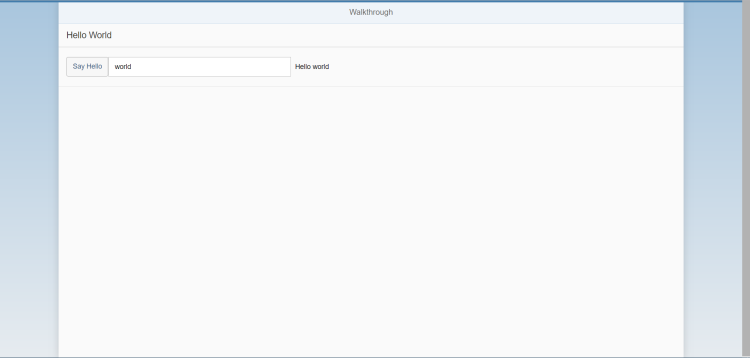
- The application runs successfully in the browser.
Upload the SAPUI5 application as a BSP application from Web IDE itself (Alternative)
Steps
- Right-Click on your project
- Navigate through Deploy -> Deploy to SAPUI5 ABAP Repository as shown below:

- Click on Deploy to SAPUI5 ABAP Repository.
- A new pop-up window will appear as shown below

- Now navigate through Deployment Options -> Deploy A New Application -> Select Transport Request -> Confirm by providing all the required information.
- Now your SAPUI5 application has been deployed into SAPUI5 ABAP Repository as a BSP application.
Step 2: Create launchpad role in transaction LPD_CUST.
- Open transaction LPD_CUST.

- Click on New Launchpad.
- Enter the Role, Instance (TRANSACTIONAL) and Description.
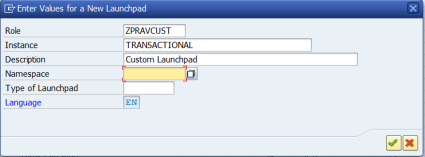
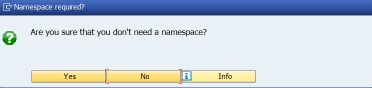
- Click on Ok and confirm that a namespace is not required.

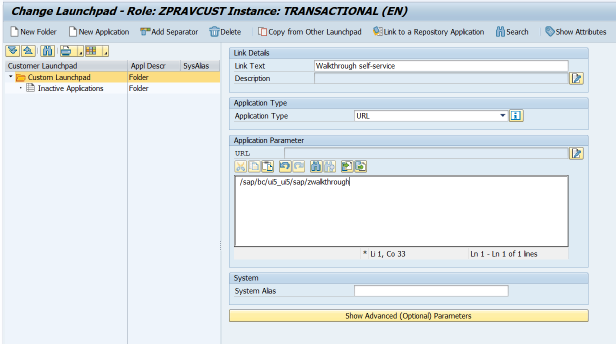
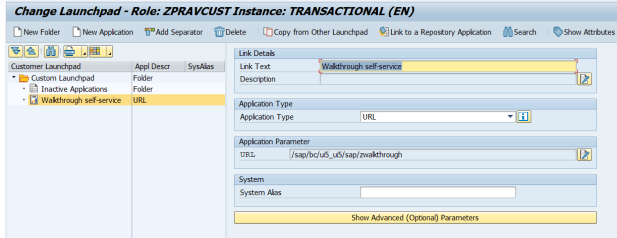
- Click on New Application.
- Enter the details shown below. In the Application Parameter section, click on the Edit icon and input the url of the BSP application.
- Click on the button “Show Advanced (Optional) Parameters“.
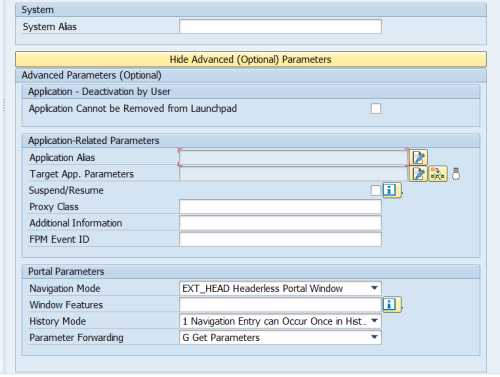
- Click on the Edit icon for Application Alias and enter zwalkthrough.

- Click on Save and the launchpad instance will be created.
Step 3: Create a semantic object in /UI2/SEMOBJ
- Open the transaction /UI2/SEMOBJ.
- You will get a message that the table is cross-client. Click on OK.

- Click on New Entries and enter the following information.

- Save the changes into a transport request(TR).
Step 4: Create a tile in the Fiori Launchpad
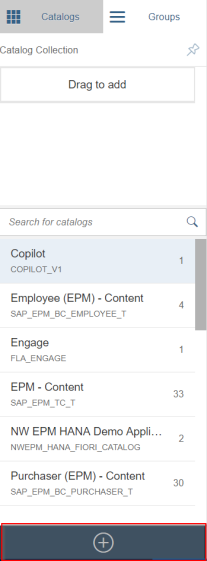
- Open the Fiori Launchpad Designer using transaction /n/UI2/FLPD_CUST.
- Create a new catalog by clicking on the Plus(+) icon at the bottom of the left-hand side pane.
- Enter the following details:
- Title: Walkthrough Catalog
- ID: ZWalkCatalog

- Click on Save. The new catalog is saved and now appears as shown below.

- Next, create a target mapping.

- Click on the following icon.

- Enter the information shown below.
- From the drop-down list for Application Type, choose SAP Fiori App using LPD_CUST.

- Click on Save.

- The saved target mapping will appear in the right-hand pane.

- Next, create a static tile by clicking on Plus(+) icon as shown below:

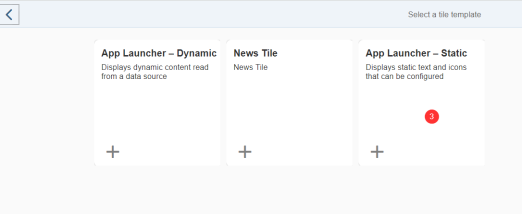
- Enter the following information and click on Save.

- The new tile will appear in the catalog.

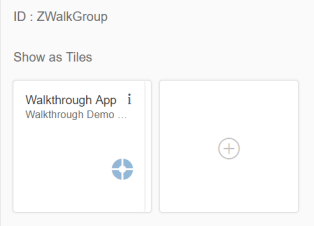
- Next, create a group. Click on the Groups tab on the left-pane.
- Click on the Plus(+) icon (Create Group) at the bottom of the left-pane.
- Enter the following information:

- Click on Save.

- Add the catalog to the group. Click on the Add Tile icon. Select the catalog created earlier and Click on the Plus(+) icon. It will turn to green to indicate that it was added successfully.

- The group will now show the new tile.
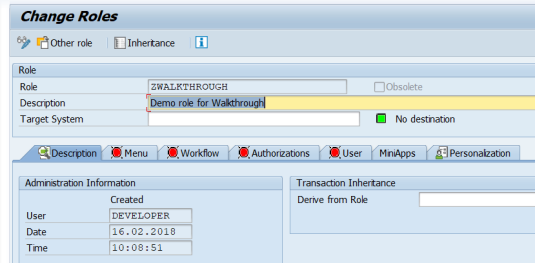
Step 5 : Create a PFCG role.
- Go to transaction PFCG.
- Enter a name for the role and click on the button Single-Role.
- Go to the menu tab.
- From the Insert Node drop-down list, choose SAP Fiori Tile Catalog. Select the catalog and click on OK.

- Add the group by using the Insert Node again.


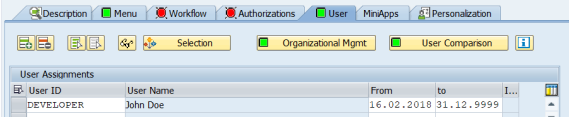
- Add the user in the User tab and click on Save.
Step 6: Test the application in the Fiori Launchpad.
- Open the Fiori Launchpad using transaction /n/UI2/FLP.
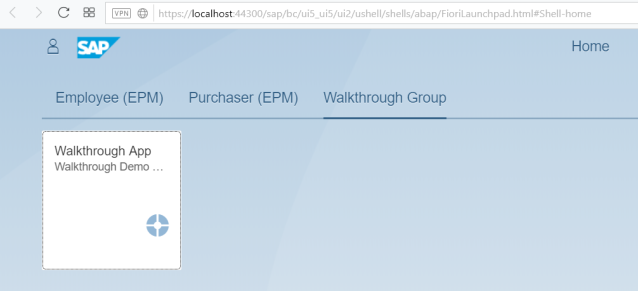
- Click on the tile to open the SAPUI5 App.
- Your SAPUI5 application will now be loaded in SAP Fiori Launchpad as shown above.
Summary
I would like to conclude that by reading this blog post you will learn how to deploy an SAPUI5 application into SAP Fiori Launchpad. Your feedback is valuable to me so please do share your feedback and thoughts in the comment box.
You can refer to other resources on SAP Fiori using the following links:
SAP Fiori Topic Page SAP Fiori
Ask questions about SAP Fiori and follow Ask Questions
Read other SAP Fiori blog posts and follow Other Blog Posts
Please follow my profile for future posts Mazhar Ansari