This blog describes the steps necessary to configure user-propagation (a.k.a. Single-Sign-On or SSO) between an extension app running on SAP Cloud Platform (SCP) and SAP Hybris Cloud for Customer (C4C) based on the User ID of the user logged in to SCP.
SAP Hybris Cloud for Customer supports OAuth 2.0 SAML Bearer Assertion Flow.
For more up-to-date information on this topic, please refer to this online help page.
Prerequisites
-
- The OAuth 2.0 based authentication between SCP and C4C requires the same user-id to exist in both SAP Cloud Platform and SAP Hybris Cloud for Customer.
-
- In C4C:
-
- An OAuth Identity Provider is configured.
-
- An OAuth client is registered to be used by the destination created in SCP.
-
- In C4C:
-
- In SCP:
-
- A destination pointing to the OAuth client registered in C4C.
-
- The App uses the destination created in the previous step.
-
- In SCP:
Configuring SAP Hybris Cloud for Customer
Capturing the required information from SAP Cloud Platform
In order to configure the OAuth Identity Provider in C4C, you will need some information from the respective SCP tenant. Hence, in a separate browser window, go to SAP Cloud Platform Cockpit and open Trust under Security.

Then follow the steps below:
-
- Temporarily change the Configuration Type to “Custom”.
-
- Copy “Local Provider Name” to provide as the value for “Issuing Entity Name” while configuring the OAuth 2.0 Identity Provider in C4C.
-
- Copy the text under “Signing Certificate” and save it as a .cer certificate file.
The Certificate file mentioned above should have the following format:
-----BEGIN CERTIFICATE-----

<The text copied from the Signing Certificate box in Trust Management screen in SCP>

-----END CERTIFICATE-----
Make sure to click on Cancel to discard any changes you might have made in the “Trust Management” screen.
Creating an OAuth Identity Provider
Open Configure OAuth 2.0 Identity Provider under ADMINISTRATOR à COMMON TASKS and click on New OAuth 2.0 Provider.


Then follow the steps below:
-
- Set “Issuing Entity Name” to the value of “Local Provider Name” copied from Trust Management screen in SCP Cockpit.
-
- Set the .cer certificate file created in the previous topic, to “Primary Signing Certificate”.
-
- Marking Email Address in the above screen has no effect. Hence, leave it as is.
After successful configuration, OAuth 2.0 Identity Provider should be listed as active.

Registering an OAuth 2.0 Client
Open OAUTH2.0 CLIENT REGISTRATION tab under ADMINISTRATOR and click on New.


Then follow the steps below:
-
- Client ID is automatically generated.
-
- Enter a value under Client Secret.
-
- Provide a suitable description for your client registration.
-
- Choose the previously defined OAuth 2.0 Identity provider, as the Issuer Name.
-
- By default, OAuth token will be valid for 3600 seconds (i.e. 1 hour). Feel free to change this value, if you need.
-
- Under scope, select the desired value(s). UWC:CC_HOME should work for most.
Configuring SAP Cloud Platform
Capturing the required information from SAP Hybris Cloud for Customer
In C4C, go to ADMINISTRATOR à COMMON TASKS à Configure Single Sign-On. The value under Local Service Provider should be assigned to Audience in the respective SCP destination.

Defining an OAuth 2.0 destination in SAP Cloud Platform
In SAP Cloud Platform, destinations are the ports that allow access to external systems based on various options. Extension apps then refer to these destinations to connect to their desired external systems.
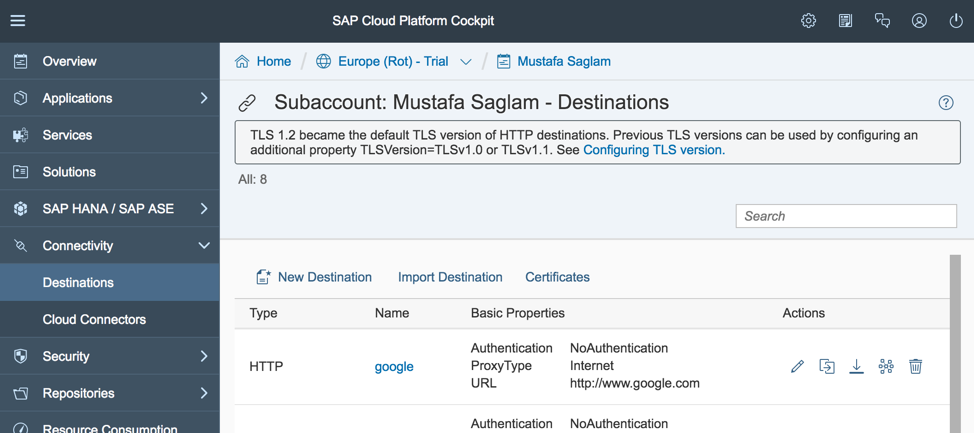
In order to create a new OAuth 2.0 destination pointing to your C4C tenant, in SAP Cloud Platform Cockpit, under Connectivity, choose Destinations. Then, Click on “New Destination”

Following table describes the parameters required for configuring an OAuth 2.0 destination
| Parameter | Value |
| Name | A descriptive name uniquely identifying the newly created destination |
| Type | HTTP |
| URL |
OData Service URL e.g. https://my315537.crm.ondemand.com/sap/c4c/odata/v1/c4codata |
| Proxy Type | Internet |
| Authentication | OAuth2SAMLBearerAssertion |
| Audience | “Local Service Provider” from C4C SSO Configuration screen |
| Client Key | Generated “Client ID” of the registered OAuth 2.0 Client in C4C |
| Token Service URL | https://my<tenantID>.crm.ondemand.com/sap/bc/sec/oauth2/token |
| Token Service User | Generated “Client ID” of the registered OAuth 2.0 Client in C4C |
| Token Service Password | “Client Secret” of the registered OAuth 2.0 Client in C4C |
| Additional Parameter | Value |
| authnContextClassRef | urn:none |
| nameIdFormat | urn:oasis:names:tc:SAML:1.1:nameid-format:unspecified |
| scope | Required scope in C4C. E.g. UIWC:CC_HOME |
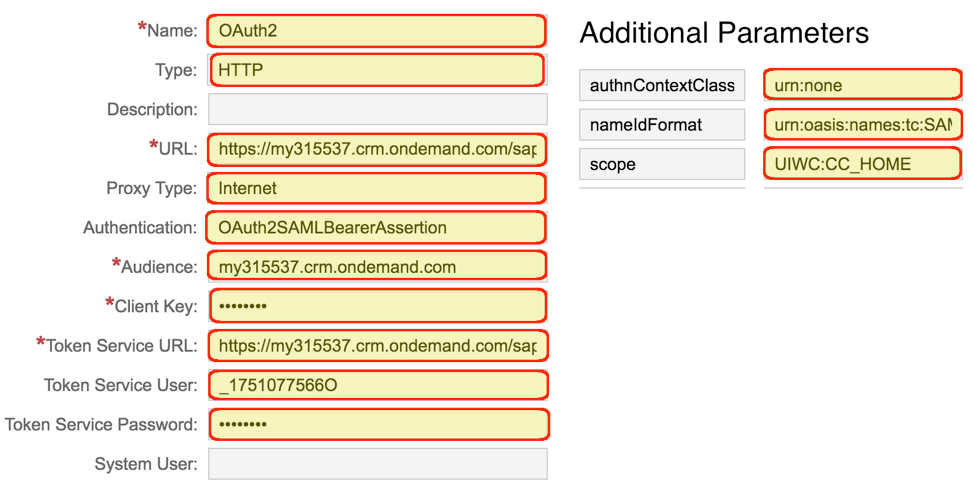
Here is an example for a destination definition named “OAuth2” with standard and additional parameters:

Please note that modifications to an existing destination will take several minutes to take effect. In order to avoid possible issues, you may want to stop your app and restart it before testing your changes in the destination.
As there are several steps, it is rather easy to make mistakes while configuring the OAuth between SCP and C4C. Hence, please take your time in following the steps above.

